Hey Guys!!!
Welcome back!!!
It's been far too long! And guess what?! Messy Sweetness turned two today!!! I'm over the moon excited on this new chapter. Regardless of my last post having been in April, I can tell you exciting days are ahead. I would love to give you a short summary of my doings in the past few months, however, even a short summary would seem eternal. So, I'll just focus on key adventures and my endeavours of late.
 |
| Happy Birthday Messy Sweetness!!! |
My last post hinted a slight disappointment in the way things were coming out in my life. Overwhelmed with orders and work, I had no motivation or inspiration to sit down and type away. Although I had much to write about, the words just wouldn't come. Sleep didn't come easy and I found myself tired all day, every day. But a ray of light shone on my dark days when come June, I was off on a short trip. I prepared myself and my now assistant to make sure everything was to be tip-top on the days I wouldn't be here. She started from 0 and now she's a pro. I left my fridge fully stocked as not to overwhelm her with the incoming orders that were unavoidable. But I left content. I was finally having a vacation after 6 months of no "me-time".
My parents and I met my sisters in Philadelphia. We were there to attend and celebrate my brother's graduation from the University. We couldn't be happier or prouder and slowly I felt my stress melt away. I sleep soundly, waking up more refreshed than I could recall and just ready to take on the world. Philadelphia is a beautiful city. We stayed in University City, are where most of the Universities in the city are located, with students walking to and fro in the busy streets. I enjoyed my time thoroughly, delighting in the amazing food we had. My brother took us to Reading Terminal Market, a famous food market which holds the voted "Best Sandwich in America" in its stalls. We secured a couple of diner stools in Tommy DiNic's Roast Pork and Beef and we let our brother order for us. I was a bit taken aback by the ginormous sandwich that was flying towards me. Spiced and well seasoned, and topped with delicious provolone cheese and broccoli rabe (I'm sure there was some mustard on it) the sandwich was out of this world!!!
 |
Moderately spicy, this big sandwich
is a bomb of flavours. |
Among other great places we ate were the quaint Jamonera, a Spanish Tapas place with a great watermelon sorbet and amazing dessert wines; Doc Macgrogan's Oyster House (despite the majority of reviews I've read having been bad, the entire party had a great time! The New England Lobster Bake was finger-licking good and I had my first taste of Lobster Mac & Cheese...WOW!); Smith and Wollensky, one of the top Steakhouses in the city, featuring a Bone in Rib-eye which most of the patrons ordered...being 24 oz I cowered away and instead delighted myself with a 10 oz Coffee & Cocoa Rubbed Filet. I was a little let down with the seasoning, as it was all charbroiled, but the soft filet inside made up for it.
It might seem like we spent most of our time eating...and that may not be far from the truth, but before the trip was over, a smaller group of us headed for New York City.
Some of my favourite movies of all time take place in the Big Apple and I had only ever dreamed of visiting the city and so my big chance came along. The train ride was spectacularly short and in no time I was emerging into a massive unstoppable crowd at Penn Station. My older sister points outs the exit to hail a cab and I am completely blown away. Towering edifices surround us, boistering masses passing us by, horns honking and my initial reaction is: I HATE NEW YORK! And suddenly, it hits you. As you move along the busy streets, you begin to blend in with the city and you feel it. You feel the city's life and a grin from ear to ear takes over.
 |
| My handsome brother and I, touring around the city |
I couldn't decide where to watch with so much going on at once. We reached my sister's apartment, settled the bags down, changed into comfortable shoes and in no time, we're back out, walking down Madison Avenue. I'd relate the entire trip but a single post wouldn't suffice. Interesting things that happened include my feet blistering from the blocks walked up and down, having a slice of pizza at Joe's Pizza, missing the final ferry to the Statue of Liberty (thank God! for the Staten Island Ferry), getting lost near the ferry stations as a marathon taking place disrupted the Tour Bus stations and then realising the tours for the day were over, the breathtaking view atop the Empire State Building, shopping at midnight, riding the subway from Grand Central Station, eating chicken over rice from a local food truck, walking past Central Park (it stinks! so many horses hahahaha) and falling in love with the aesthetic beauty of the Chrysler Building.
 |
| New York, New York!!! |
With so little time, we did so much. The trip left us all slightly tired, but it was definitely worth it. The only thing I did not enjoy as much as I do back home was the coffee. Thank you Honduras for our amazing beans!
 |
| A lovely "Dirty" Chai at Copa Café |
Back in the game of baking, I fulfilled several orders of all kinds, even ventured into a Cars Fondant cake for a sweet little boy. Sadly, there is no perfect picture of the fabulous cake, as settling it down, the father figure miscalculated how far the table was and the cake cracked massively. From what I heard, mom wanted to murder him. I felt a little murderous too, after almost 10 hours working on the two tiered beauty.
 |
| This beauty received many-a-compliments |
I made a couple of White Chocolate Vanilla Bean Cakes for a wedding reception, which were well received and complimented by the Australian party that had flown to Honduras for the ceremony. I also tried out the Chocolate Chip Cookie Cake from another blog, a request from a friend, who also asked for this cake:
 |
| A moist Yogurt cake filled with cream and berries |
I decorated cakes with a petal detail, made a Chocolate Cassata for my mother's birthday and baked Orange Chiffon Loaves for a Mother's Day lunch. But My absolute favourite cake from the past few months is this gorgeous Naked Vanilla Bean Cake I made for a birthday.
 |
| My Ethereal Naked Vanilla Bean Birthday Cake |
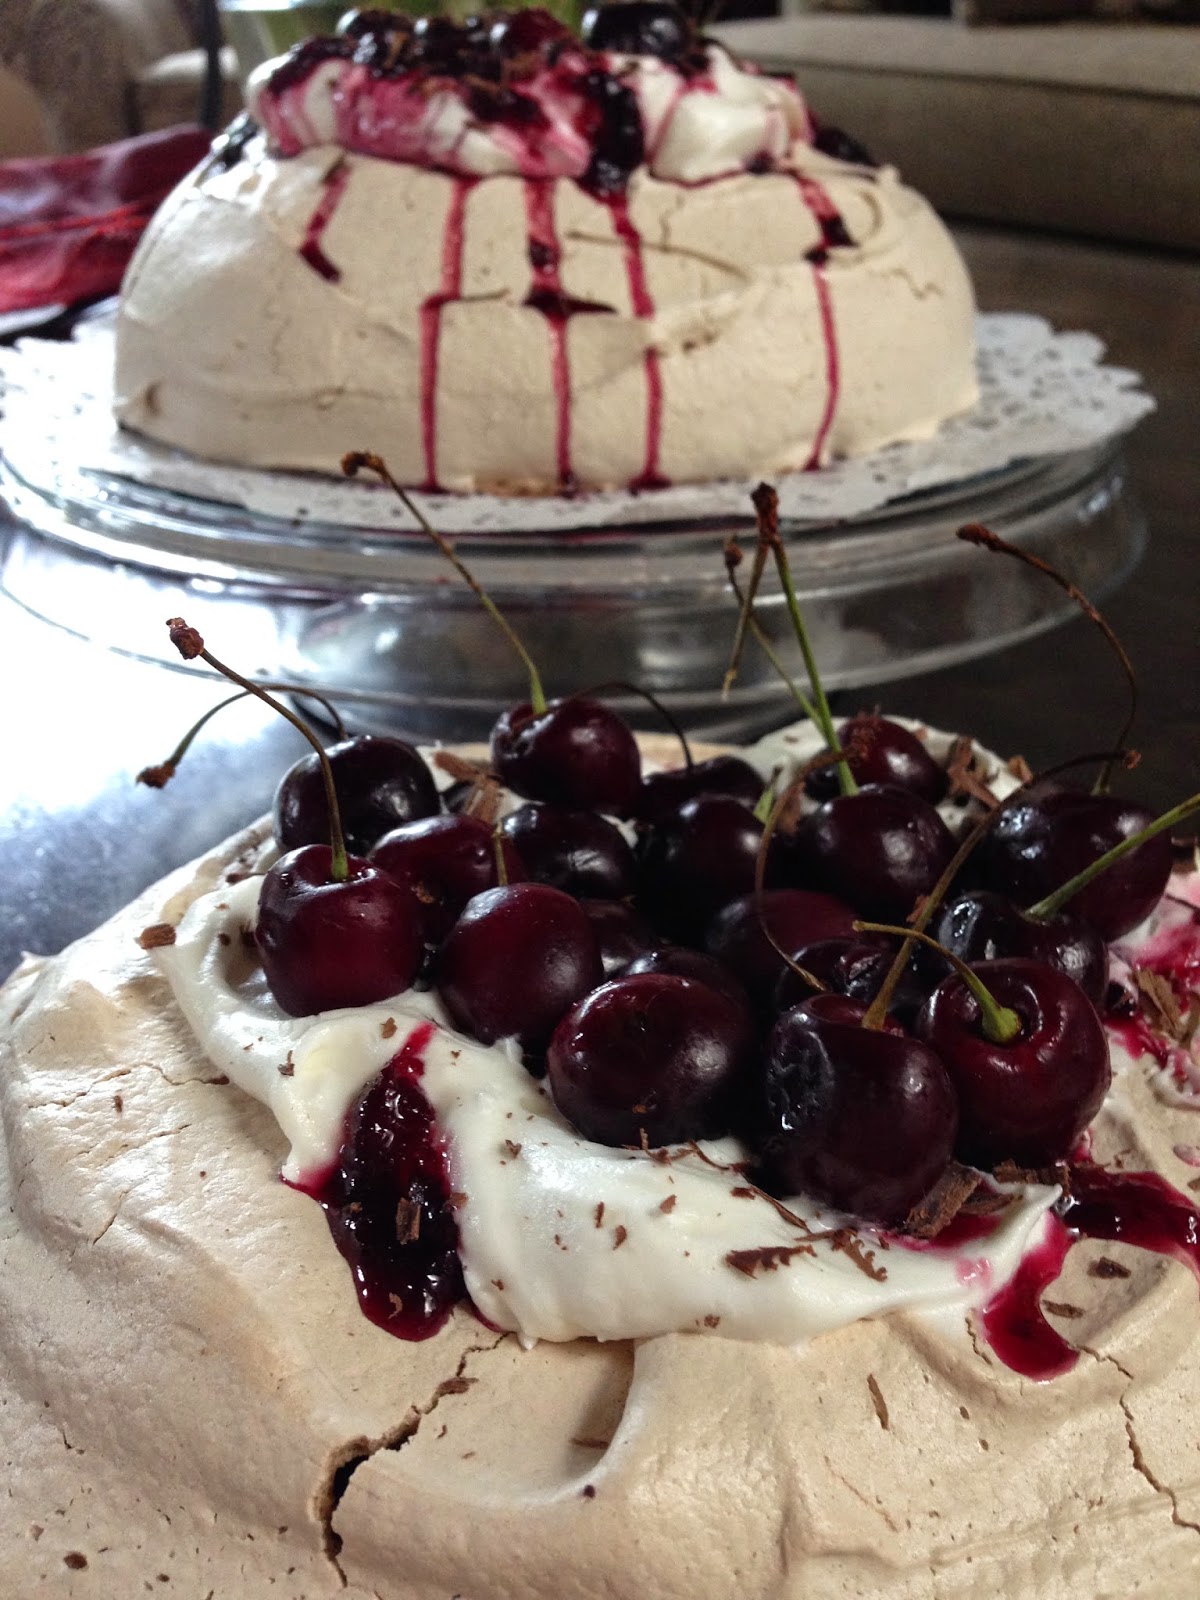
So now you see...I have been very busy, and seeing as my blog has turned 2 years old (Prach, do you remember the day I texted you saying I opened it?), I baked a Black Forest Inspired Pavlova. Even better? The recipe's further down! Hehehehe. Mind you, a few pointers to follow. The reviews were great, but personally, I'd cut down the sugar, to at least 1 cup. Ready to try it? Anchors away!!!
 |
| Yummers! |
Until next time!
You guys are the best!
xx
Black Forest Inspired Pavlova
Yields: 2 8" Meringues
Ingredients:
Meringue:
8 fresh egg whites, room temperature
2 C. sugar**
2 T. cocoa powder
1 t. vanilla extract
Filling:
2 C. heavy whipping cream**
2 T. confectioner's sugar
1 t. Cognac
Cherry Compote:
1 C. pitted cherries
2 T. sugar
1 T. water
Toppings:
Chocolate bar to shave and/or make curls
A many cherries as you like!
Procedure:
Meringues:
1. Preheat oven to 420 F.
2. In a clean bowl, pour egg whites and beat on medium speed until foamy. Gradually add the sugar until completely dissolved. To make sure, rub some meringue between thumb and forefinger. If it feels grainy, continue beating. Otherwise, the meringue will weep. Once the sugar is dissolved and you have soft peaks, beat in vanilla. Beat until stiff peaks form. DO NOT OVERBEAT! This will cause the meringue to break.
3. On parchment paper, trace 2 8" circles. If using the paper, turn it over before placing meringue on top. You can also cut the circles out and use under a silicon mat. I did this.
4. Evenly distribute the meringue between both circles, making sure the the meringue stays inside the lines. With a palette knife or offset spatula, gently spread the meringue to the lines and make a well. This will ensure the filling has somewhere to stay.
5. Place in the oven and immediately turn temperature down to 250 F. Bake for 90 minutes. Turn oven off and leave meringues inside until oven is cool. Do not remove before.
NOTE: this type of meringue has a harder shell. If you wish for a thinner, softer one, you can remove the meringue after the baking time. Try it both ways and decide which one you prefer.
Filling:
On a large bowl, using a standup mixer with whisk attachment, beat cream until soft peaks form. Add the sugar and the Cognac and beat until stiff peaks form. DO NOT OVERBEAT or the cream will separate and curdle.
Cherry Compote:
In a small saucepan, heat up pitted cherries, sugar and water over medium heat. Once the cherries have swelled, smash them and heat for another 2 minutes. The compote should be dense. If you wish for a runnier consistency, add water by teaspoons. I prefer mine a bit thicker. Leave to cool and refrigerate until ready to use.
NOTE: I had no cream available at the time, and instead used a local product, equivalent to DreamWhip Topping. The result is the same. If you have cream available, use the cream. If not, this Chantilly Cream mix offers a lovely flavour and it's a great substitute.
Assembly:
Place meringues in serving plates or cake stands. Equally distribute cream between the shells. Shave some chocolate on top of the cream. Pour half of the compote on each pavlova over the cream and chocolate, allowing some to drip down the shell. Finally, top with as many cherries as you like and some more chocolate to ensure extra taste!
Enjoy.